Science Tools

Recently, with the Kindergartners, we have been studying how we observe and describe objects using our senses, now we are learning how we not only use our senses to study objects, but how we can also use science tools to describe this as well. 

I started with reading the essential question: How do we observe and describe objects using science tools? This generated questions from them like what is observe and what is an object? 

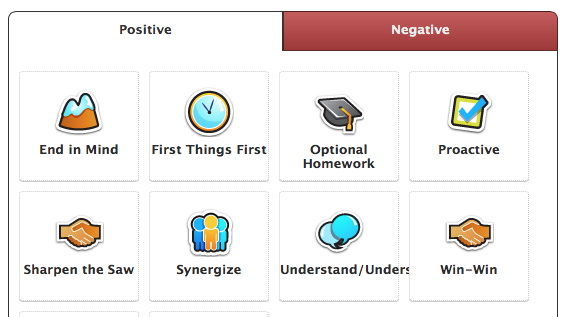
Then we looked at visuals of pictures of science tools.

Then we talked about each tool individually and how we were going to use each station.
We talked about things we thought were the "right" things to do with each tool and things that we thought we "incorrect." Once we knew the right things to do we turned and talked to our partners to "teach" each other how we should be using this tool. 

I used this packet for this lesson.
Science Tools Cover
click image to go to Kathryn's blog

Then we would talk about what we would do. I would not explain right away, I would leave it open-ended by just displaying the visual to generate questions and keeping it student-led. 
There were 5 stations altogether. I also let each child choose where they would like to go, showing them only how many was allowed in each station. 


The Stations At Work

The Pan Balance Station

The dropper station


Dropper-counting how many drops on penny

An app-Gazzili Science which incorporated a sink and float activity

Hand Lense Station

How Many Scoops?
Overall the children enjoyed each station and at the end of the lesson we were able to share out what we experienced at each area.

Enjoy!


Do you Dojo?

I discovered Class Dojo about a year ago. If your looking for a new way to manage your class this is a great start. Plus it's FREE!! It requires technology, so you pretty much need a computer, smartboard or an ipad to utilize this. Currently I use this with the 4th grade class. It's a huge incentive to earn "Dojo" points! You can also take points away. I do not take points away--as I try to keep this goal-oriented. If a student has an issue; calling out, I may make that one of the behaviors they earn for by turning it into a positive; I raised my hand to answer a question. The students know that they just won't accumulate points if they choose to do the wrong thing. They definitely do not like that--they can see how others are doing,  it is displayed on the smartboard. Although, when they log in at home, they are only able to see their points.

                                                
You can play this video to help explain to the students what class Dojo is. It is on their website as well.


You can access Class Dojo HERE. Or you can download the app on itunes. First you need to register your class. Each student gets their own Avatar that they can change and custom design once they get their own secret code which is generated by the website. It easily creates individual print-outs for each child with instructions for the children to follow at home. This is usually my first incentive. If they earn 10 Dojo points to start, they get to take home their secret code. This gets them very excited. If you choose to keep your volume on, every time you give a point it can makes "Ding" sound.


What's great is that you can custom the goals or behaviors you want each child to get. Each child also gets their own avatar which they can customize at home.


You can also put in multiple groups. If you want the children to earn for their specials or lunch you can add a separate folder for that as well.  You can make groups for centers or group the children in teams for certain areas and let them create their own team name.


It also gives you percentages on how well the class is doing, as well as individual percentages which you can print-out as data! Plus parents can go on each night to see how well their child is progressing as well. If they can't access the site, Class Dojo also allows print-outs on their progress which you can send home.


There is a also a timer feature as well.


I found a few bloggers with some great ideas for Dojo. If you are looking for rewards to give out for points you can look HERE or HERE or HERE......Plus they are free! Erica over at Erica's Ed-Ventures also has a great post on Class Dojo--- plus she also has some great FREEBIES!


Matter Chatter! FREEBIE

In first grade, we moved from discussing how heat changes different properties of matter, to how matter and mass are related. I found this great idea from April over at Chalk Talk. It really helped the children understand what mass is. Most children may believe that the bigger the size, the more mass it has.First I talked to the children about matter and what it is. We watched a video from Harry Kindergarten on  YouTube, called Matter Chatter.


                                             Then we discussed with each other what we learned.

I then took out a beach ball and an apple.


                           We then filled out this and predicted first which we thought has more mass.

We then passed around the beach ball and the apple.


Then we talked about which REALLY had more mass. We soon discovered that even though the beach ball is larger, the apple has more mass and more weight. We also discussed why this is. We talked about how the beach ball has air inside and the apple has much more matter than just air inside, which made it have more weight.

Then we wrote what we discovered.

The apple has more mass because their seeds are not air and seeds are solid.

You'll notice the worksheets are different depending upon abilities. This student had more more lines to write with, where the first sheet was more of fill in.

After this they worked in cooperating groups to decide which objects had more mass. I have to say after observing them, 100% of the children understood which objects had more mass and they could tell me why. This is also from April at Chalk Talk. You can find this on her Teachers Pay Teachers.


Don't forget to download the FREEBIE, Which Has More Mass? !

ENJOY!


Dealing With Anxiety FREEBIE

There are many stressors that may trigger anxiety in children. For the most part, anxiety is a normal human emotion that we all experience at times. Anxiety becomes a problem if your child is experiencing so much anxiety that it is interfering with their ability to function in school and home. While speaking with your doctor is the first step to helping you child, here are some ideas that you can do at home or offer to your child’s school setting.
The most important activity that you can do is teach them how to calm themselves, what we call as self- regulating.  Breathing exercises are very important in maintaining a state of calmness. It could be as simple as having the child interlocking their hands and squeezing them. From there they take deep breaths in and out slowly. You may want to start by having the child blow bubbles. You can then show the children different types of breaths as well. You can have them breathe in slowly and out like a snake; making a hissing sound. You can also do a flower breath. The child can pretend to stop and smell the roses and breathe in through their nose like there smelling a flower and slowly out of their mouth.  For a great book to use with your child, please look to When My Worries Get Too Big! A Relaxation Book for Children Who Live with Anxiety by Kari Dunn Buron. This book has been wonderful for my students and parents in the past.

Kari Dunn Buron has a wealth of information and her books are AMAZING! She also has great books on the five point scale which I will discuss on a future post. CLICK HERE for her website!


Doing yoga with your class is also very good. There are many great yoga videos that are specifically for children, but also you easily be done at home or school by playing some meditation music and researching some yoga moves online and starting from there. You could even print out some of the picture of positions so you have them on hand for next time. 

Here's a video you can use.


One of the things that have helped my students in the home and school was to carry their favorite picture in their pocket. It could be a picture of a great memory, person, character etc. By looking at this picture from time to time, allowed the student to display less anxiety. If the child looked at the picture while doing breathing exercises, it also reduced stress.   Putting a soft pencil grip on their pencils also helped children with anxiety as well. They could squeeze the grip from time to time.


Many children can also display anxiety when answering a question in class. When this happens, it’s best that the teacher give the child a question that will be asked in the lesson ahead of time. This way they know what question is coming. I also allow them to either raise their hand to answer or write down the answer. They also get to choose out of two questions which one they would like to answer for the lesson.
You can find this file for free HERE. Cut out and laminate and use dry-erase marker to rewrite questions throughout the day.


Anxiety can also be displayed in class when answering a question out loud. In order to reduce anxiety I give that student cards on their desk and they must display the card that best describes how they are feeling about the question being asked. One card may say “I really don’t know,” or “I know the answer, but I want to write it down.” Or “I need more time to think.” It gives them a discrete way of letting the teacher know how they are doing without feeling anxiety about giving a wrong answer, or not participating at all in class.


Find the file HERE

Enjoy!


Martin Luther King Jr. Day!

On Friday I did a lesson with the kindergartners about Martin Luther King Jr. I was inspired by a few blogs for these ideas and will link them up so you can use them as well.

I started out by using a white egg and a brown egg to help getting the children to start generating questions and ideas about the idea of civil rights and what Martin Luther King stood for. Sorry for the bad pictures! I forgot my camera and I had to use my ipad.

Here are the eggs. We started by turning and talking to our partners. We generated questions and asked each other how they are different.

I found this idea through Deanna Jump.

After we discussed the eggs, we cracked them open to see what they look like inside.
The children soon discovered that even though the eggs looked different on the outside, they are the same on the inside. We then began our lesson on Martin Luther King Jr. and discussed that he stood for equal rights for all.
I also found this great FREEBIE from Little Warriors Blog that you can also use for this activity.


We then watched a video of Martin Luther King Jr. There are so many. But this one I chose for Friday.


We also sang this song.


With a few ideas from Kim over at Kindergals, we started our Martin Luther King Jr. project.
I showed them a model on the smartboard. I gave them each a baggie of squares of the colors that they needed. These squares are cut according to the size needed and the children have to cut the corners to make the shapes round. Using this idea, the projects are able to look unique to each child and not cookie-cutter like. Which I hate! Look how great they came out!
                                     
                                                   The black mouth area is a mustache, hard to tell from picture. 

Some of our completed projects!
Kim at Kindergals has this in her unit as well as other great ideas. Visit her at Teachers Pay Teachers for her unit!

                                                                             ENJOY!


Learn How To Save a Video To Your Flashdrive!

You see a video on the internet and you want to show it in your classroom. Many times you may not be able to access the internet or your internet may be very slow and uploading the video may be choppy or slow. In that case,  you may want to save that video to a flashdrive so you can have access to it right away! Here's how. I know people with apple computers can save a video pretty easily, but for people without it, it is a little tricky.

1.) Get a flash drive with at least 16GB. Video files can be large.
2. Insert flashdrive into computer. 

3.) Download a video-file converter. The one works well.  CLICK

4.) Open the video-file converter.
5.) Next go the the website where your video is:

6.) Right click right over the video and click on copy video URL.

7.) Go back to your video file converter open the download tab and paste the URL link into the bar. Most of the time once you put the mouse right over the white bar it automatically pastes it in without you clicking anything.

8.) Click the folder under download quality where you want to save the file. I saved it in my documents.
9.) Click the red download button.
10.) It should go to this screen.

11.) It is important to convert your file IF you are playing it on a regular computer.  The file that it automatically downloads to is a file that works on an apple computer only.
12.) Click on the covert tab (next to the download and activity tab)


Click on Select the video file. Find where the video is by looking in the folder you saved it in. I saved mine to my documents folder.
Click on the video and then press open.

Now you are going to select how you want to convert the file. Go to Convert video to. Click on Windows Media Video if you want the file to play on your computer. 

Then Click CONVERT.

It should look like this now.


Click on the folder next to the red X. (it will be red when the download is finished.)
It will take you to where the file is located.

Find the video that is a Windows Media video not the MP4. That one is for an apple computer. Drag the file into your flash drive by clicking on the file and holding mouse down while moving file to flash drive and then let go of mouse when you see copy to the flash. 

Now it's in your flashdrive and ready to go wherever you go!

Enjoy!


Grab My Button!

Followers

Powered by Blogger.